A soggy delivery pizza is almost always blamed on the kitchen, but a large share of the damage happens inside the box on the way to the door. The pie leaves the oven crisp and arrives limp because the container it travels in traps the one thing that ruins texture: steam. The good news for anyone ordering custom pizza boxes is that this is a specifiable problem. Ventilation, board choice, and a couple of liner decisions are things you write into an order, not things you leave to chance. This walkthrough shows how to spec a box that protects crust texture for the delivery times you actually run.
The physics: steam is the enemy, not heat
When a hot pizza sits in a sealed box, water evaporating from the dough, sauce, and cheese has nowhere to go. It condenses on the underside of the lid and on the board beneath the crust, and that trapped moisture is what turns a crisp base to cardboard. Two processes stack on top of each other. Moisture migrates outward from the soft crumb toward the crust, erasing the crispy exterior, while the starches in the dough undergo retrogradation as they cool, recrystallizing into a tougher, staler texture. You cannot stop the pizza from cooling, but you can give the steam an exit before it condenses back onto the food.
This is why the single most effective kitchen habit costs nothing: let the pizza rest on an elevated rack for roughly 30 to 60 seconds before it goes in the box, so the first hard burst of steam escapes into the room instead of into the packaging. The box then only has to manage the slower moisture that follows. Everything below is about designing the box to do exactly that job.
Vents: how many, how big, and where they go
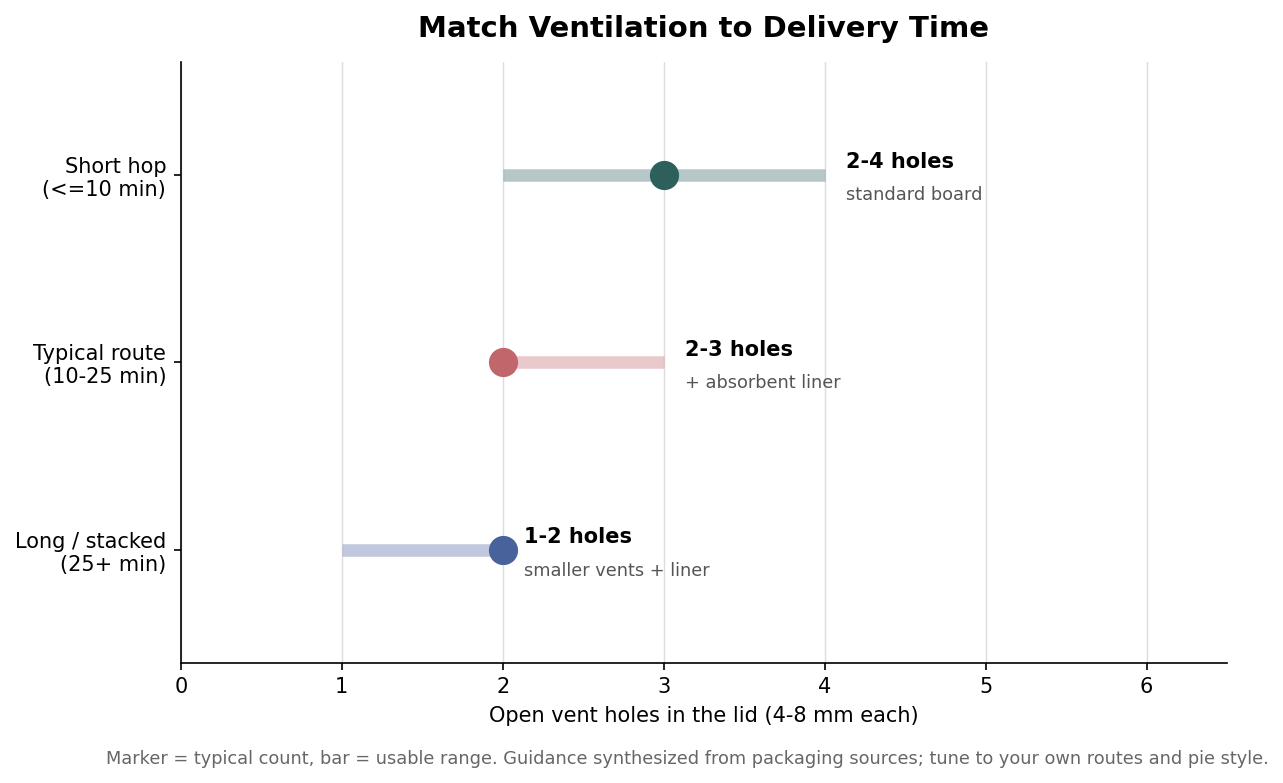
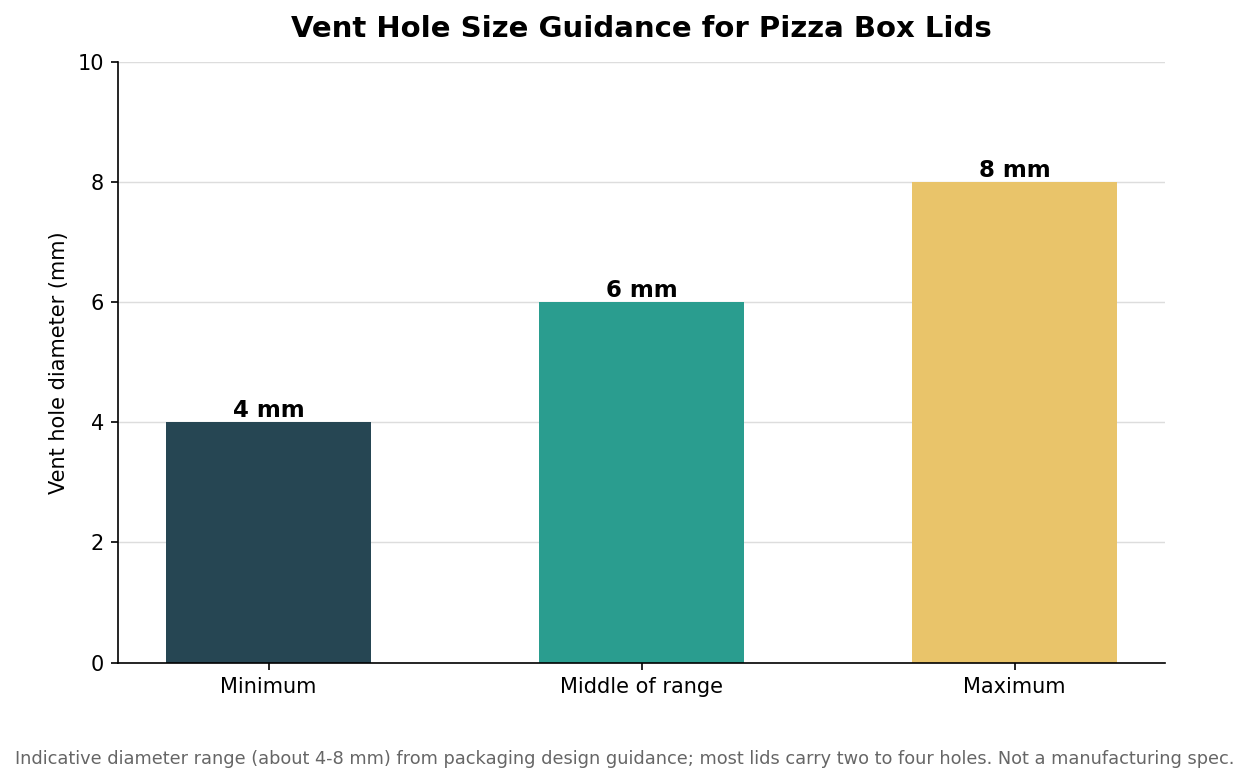
Ventilation holes are the primary tool, and the useful range is narrower than people assume. Design guidance clusters around two to four round holes, each roughly 4 to 8 millimeters across, placed on the lid or upper side panels. Too few and the steam stays trapped; too many or too large and you bleed off the convective heat that keeps the pizza warm, trading a crisp cold pizza for a soggy problem you did not fix. Placement matters as much as count: vents belong away from the center of the lid so rising steam exits at the edges rather than collecting directly over the pie and dripping back down.
Corner cut-outs are sometimes used as vents, but they weaken stacking strength, which is a real cost for any operation that towers boxes on a delivery rack or a warmer shelf. Perforated slits that a staff member can pop open after boxing are a flexible middle ground: closed for stacking strength, opened when the box is loaded. Whatever pattern you choose, keep the vents clear of your primary branding zone so a logo or artwork panel never seals a hole shut.
Board, coating, and liners
The board itself is your second lever. A stiff, food-safe corrugated stock holds its shape under the combined assault of steam and grease, where a thin caliper box goes soft and sags into the pizza. Grease resistance is a separate property from moisture venting and both matter: a grease-resistant coating or liner stops oil from wicking into the flutes and weakening the board, a topic we cover in depth in our piece on grease-resistant pizza boxes. Vent for steam, coat for oil, and do not assume one solves the other.
For longer trips, an absorbent liner or a ribbed insert earns its place. A textured liner lifts the crust a few millimeters off the flat board and creates channels for steam to travel sideways and out, instead of pooling directly under the base. On a short hop this is overkill, but past the ten-minute mark it is often the difference between an acceptable base and a wet one. Match the amount of moisture management to how long the food will actually sit in the box.
Match the box to your delivery time
There is no universal best pizza box, only the right box for a given delivery window. For short routes of about ten minutes or less, two to four standard vents on a stiff coated board handle the moisture without shedding much heat. For the typical ten-to-twenty-five-minute route, keep the vent count modest and add an absorbent liner so the slower steam has somewhere to go. For long routes beyond twenty-five minutes, or when boxes are stacked and cannot breathe freely, lean on smaller vents plus a liner rather than large openings, because at that duration heat retention and moisture control both matter and big holes cost you too much warmth.
If your menu spans dine-in takeaway and long-distance delivery, it can be worth specifying two box builds rather than forcing one design to cover every case. The incremental cost of a second stock-keeping unit is usually small next to the reputational cost of a signature pie arriving soft.
Specifying it on your order
When you brief a printer, translate all of the above into concrete instructions rather than adjectives. State the vent pattern you want, the count and approximate diameter, and confirm the holes fall outside your artwork panels. Name the board grade and caliper, and specify grease resistance as a coating or liner rather than assuming it is included. If you use a ribbed insert or absorbent liner, list it as a line item so it is not quietly dropped to hit a price target. Finally, ask for a physical sample or a dieline proof before a full run, and if you can, do a real-world test: box a hot pizza, drive your longest normal route, and open it at the door the way a customer would.
None of these choices are exotic, and none of them require premium spending. They require deciding, on purpose, that crust texture is part of your product and specifying the box to protect it. Get the venting, the board, and the liner matched to your delivery times, and the packaging stops being the weak link between a great oven and a happy customer. For a full run-through of everything else that goes on the order, our step-by-step ordering checklist walks through the rest of the spec.
Leave a Reply